


A Simple Sewing Project
Taking a plain solid tie on cushion and giving it a makeover. From drab to fab you will have fun making your ordinary cushions look like custom sewn cushions and it is so easy! It’s also fun and a pretty quick project. Let’s update a chair cushion!
The Need is Real!
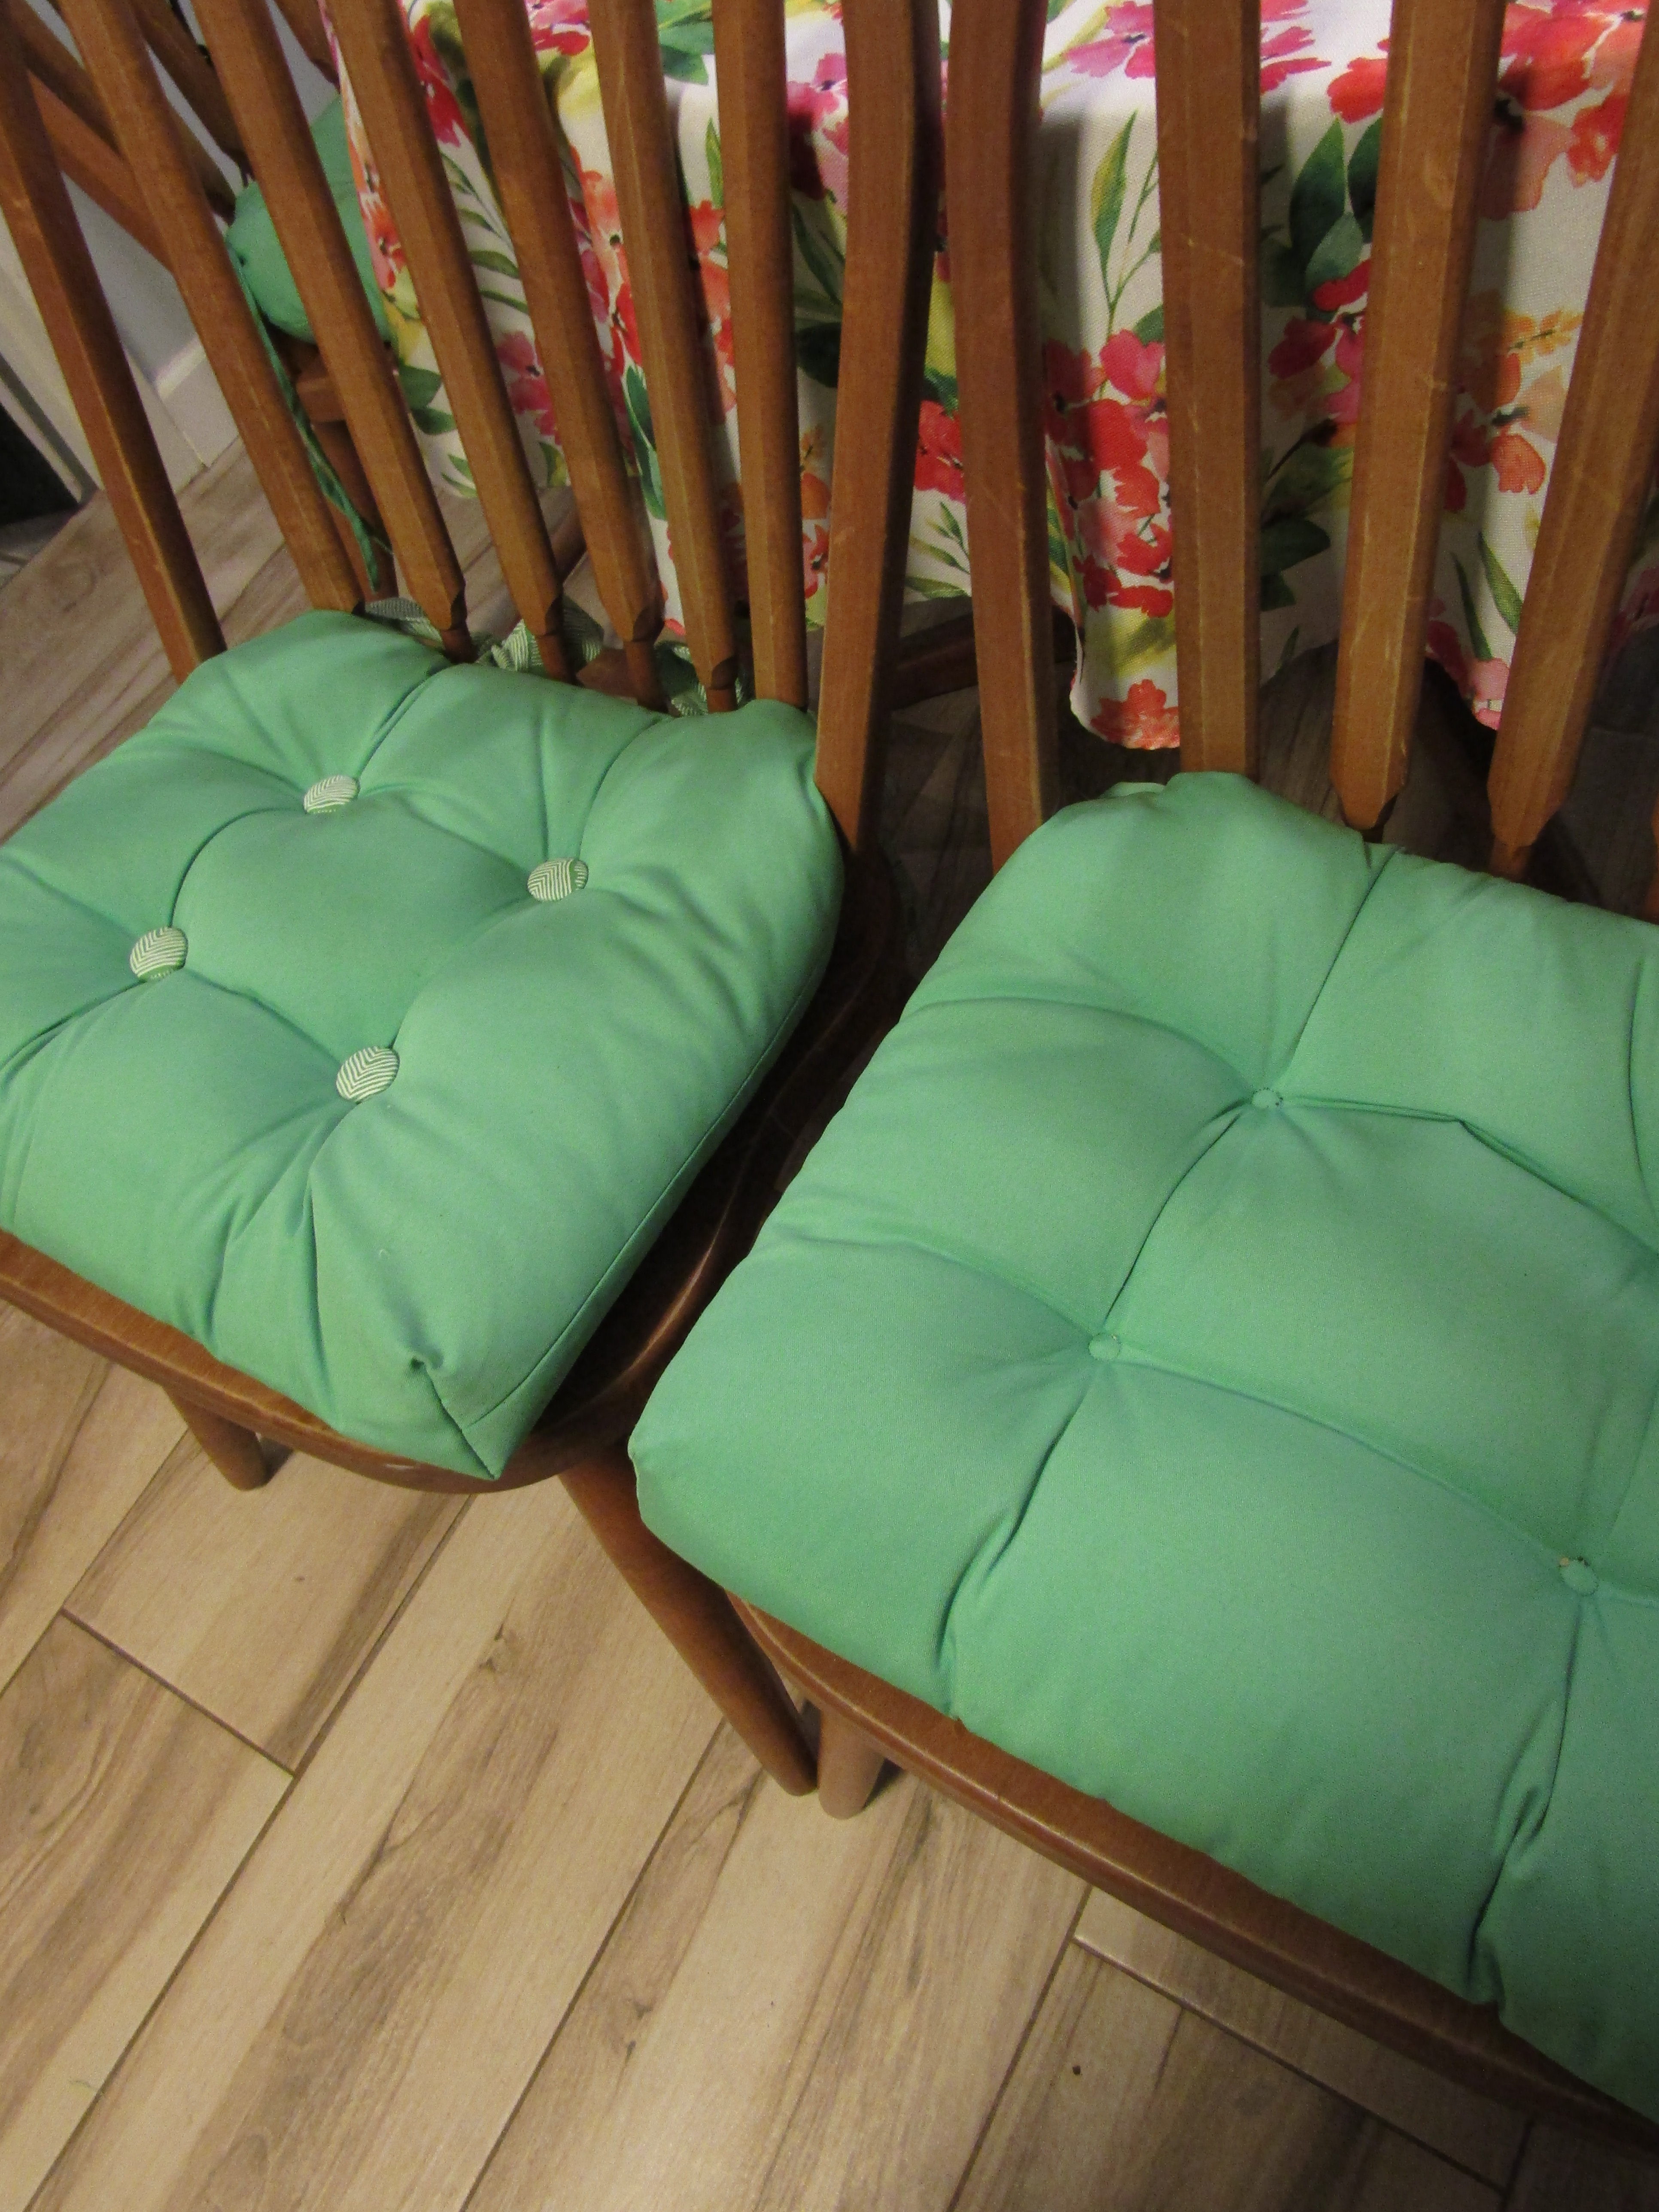
We play pinochle every week and our wood chairs get harder and harder as the night goes on. So, when I saw some spring green seat cushions on clearance at Michael’s I grabbed them. Yes, I can absolutely sew my own cushions but these were such a deal. We were playing cards that evening and I could use them right away. I have been using these cushions for a few months now and while the chairs are more comfortable, the cushions are boring.
Drab Chair Cushions
You have seen these cushions everywhere. They are pretty generic, although these are a nice fabric weight and the color was perfect. I use tablecloths on my kitchen table, always! And pretty much, every tablecloth I use has some spring green in it. I just needed to figure out a way to update a chair cushion and give them a more custom look without breaking the bank.
Choosing the Fabric
To begin this project, find a fabric to match the cushion. Depending on your taste, something simple like this or have fun with a colorful pattern. You want the fabric to compliment your cushion color. This is what I came up with at Joanne Fabrics.

This matched perfectly and was the same weight. It would have been fun to get more color into the cushion but, hey, my tablecloths have plenty of color. No need to go crazy this time!
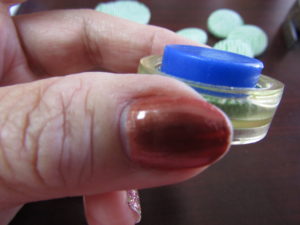
How to Cover a Button
Covered buttons are so cute and can be used in so many ways. They are easy to make and there is something satisfying in popping the finished button out of the little holder!

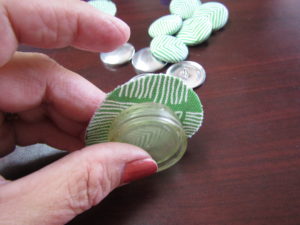
The Covered Button Kit I purchased came from Amazon. It came with a soft plastic mold and a blue pusher (not what either is called but you see them in the picture). To start, you cut circles of fabric that you want for the top of your button. The kit has a pattern so you don’t have to guess what size. You center your circle with the right side on the inside and place the round cap on top. Time to push it down and this is what you get. If it isn’t centered, pull it out and start over.


Put the button back on top of your mold, making sure it is in the mold. Center the blue cap on top and push it in. If your fabric is a little thick, use a small hammer to tap it down. This works great. Start making your buttons. You will need 32 buttons if you are doing the top and bottom of your cushion!

Now push the bottom of the mold and your beautiful button pops out perfect! Just like that!
Making the New Ties
Removing the old ties is easy with a handy seam ripper, hand sew the opening back up (skip this if you will be putting the new ties back in the same place). Next you will cut 8 strips 40″ x 3″ from the new fabric. Of course, you can make the ties narrower or shorter if you prefer.
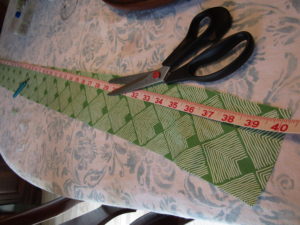
After they are all cut, fold them in half the long way, right side together and only use a 1/4 inch seam allowance. Leave about 2 inches in the middle, open (not sewn) so you can turn the tube. Once they were turned, iron each of them and hand or machine sew the opening.
Now that the ties and buttons are all made, it’s time to assemble. Use your seam ripper to open a small seam where you want the new ties. Remember, this is custom made so check your chair to determine where the new tie should go. Gather the center of your new ties and insert them into the new opening. Hand stitch it up. If you sew and wrap where you gathered it makes it a little easier to insert.
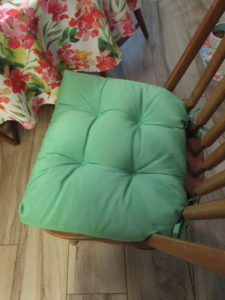
Adding Covered Buttons to Your Chair Cushion
To sew on the buttons, use heavy duty thread and an embroidery needle with a large eye. Insert 2 threads into it and made sure to have about a 12 inch length meaning each thread is 24 inches folded in half. What you have now is 4 threads that will be pulled through the cushion. Tie off your threads at about 4 inches from the bottom. The cool thing about these chair cushions is that they have a little circle right where the button will go so put your needle in the circle, flip over the cushion to make sure it is going through where you want, slide your button over the needle. Next, put the needle back through the cushion near but not on the same hole.
Tie it Tight!
Here is the trick, pull your thread tight and the one button should be in place. You will have a tail of thread on the other side along with the needle. Tie the thread with the needle and the tail tightly to secure the first thread. Now slide the second button over your needle. Making sure everything is tight, tie the tail and the thread with the needle in a knot. It’s a good idea to tie it a couple of times so it doesn’t come loose.


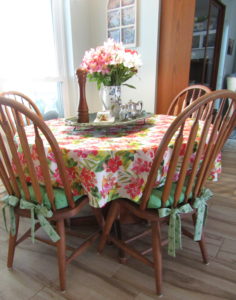
Loving how the covered buttons look. Pretty simple, not dramatic but you must admit, it looks more finished.

From generic seat cushions to a more finished custom look. If you like this project, please share how you would update a chair cushion for your home.
Now let’s see if my game gets any better!


Leave a Reply