


If you are looking for a simple potting bench that is easy and fun to build then you are in luck. This is so cute that you may be tempted to use it in your outdoor kitchen as a serving piece. Once you have gathered all your supplies, you can easily put this together in a day.
Thyme to Grow
![]()
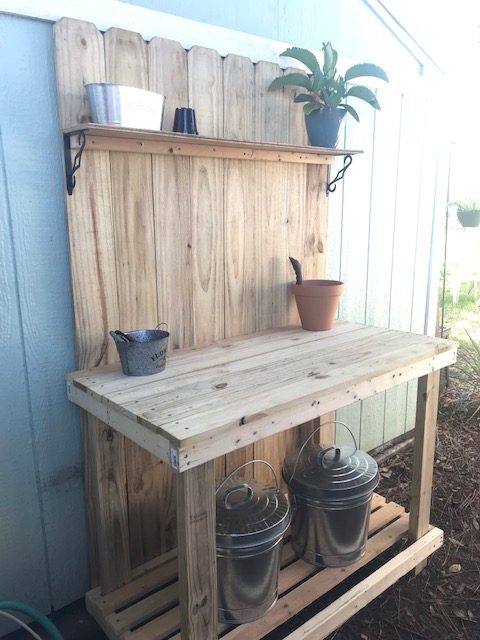
I have always wanted a potting bench. A dedicated space to work on my plants. In the past, I have used every flat surface in the yard and then had a mess to clean up. Not to mention, gathering all my tools. You know, potting soil, shovels, pots, etc. I needed a potting bench.
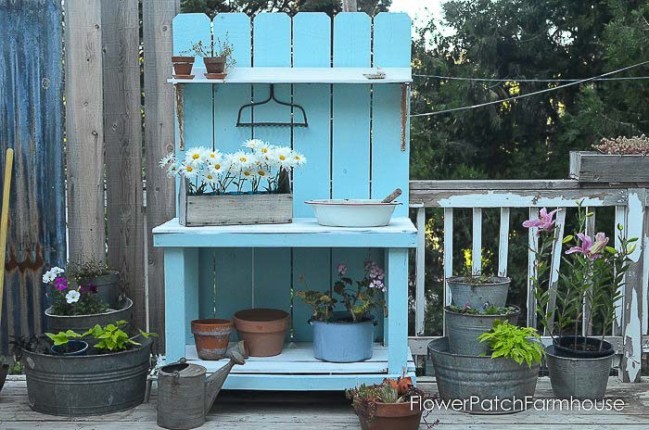
I found this beautiful potting bench on Pinterest. With so many options, Flower Patch Farm House had what I was looking for.
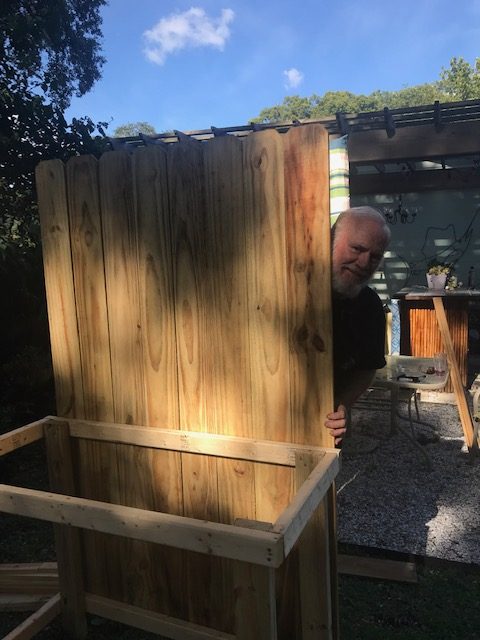
The simplicity of this potting bench was exactly what I wanted. I did not want anything fussy and I noticed many of the ideas I found were embellished with all kinds of cuteness but I will be using my bench and I wanted space to work. This was perfect and would be easy to make the work surface a little bigger. Our work surface is 24 x 48 so we added a couple of extra boards to the back.
Supplies and Instructions for the Potting Bench
We picked up the fence boards and the wood for the legs and frame at Lowe’s. We found the boards for the bottom shelf, the small top shelf and trim in our wood stash in the shed.
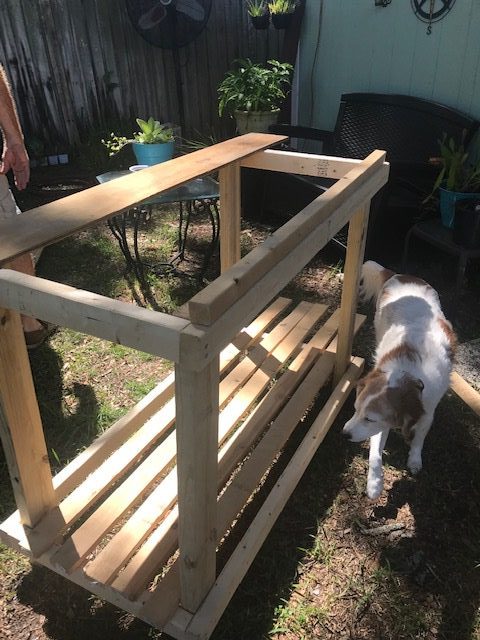
The height of my work surface was 36 inches and the height off the ground for the bottom shelf was 6 inches. If you have a wood fence, you know that the bottom often rots, especially here in Florida. To prevent that, we raised the fence posts up off the ground and attached them to the back 2 boards of the frame in hopes we have less rot. The legs are 2 x 4 treated wood and the frame is treated wood. We cut the front and back boards 48″. The side boards are 21″. Of course, you can adjust your measurements to fit your needs. Measure twice, cut once.

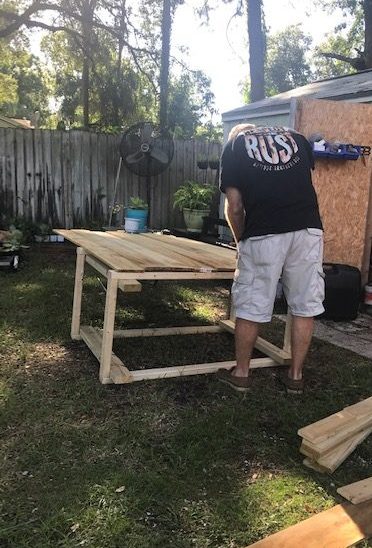
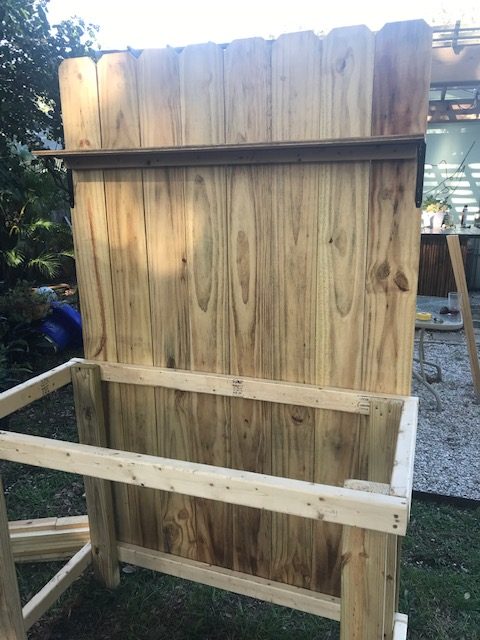
We screwed in 2 supports across the top frame and screwed the boards across the top and across the bottom shelf. We had a 1 x 1 piece of wood that we screwed across the area where the top shelf was going then we screwed the top shelf to that piece of wood and lastly we added the supports to the shelf.
 I LOVE IT!!
Why the Locking Lid Trash Cans
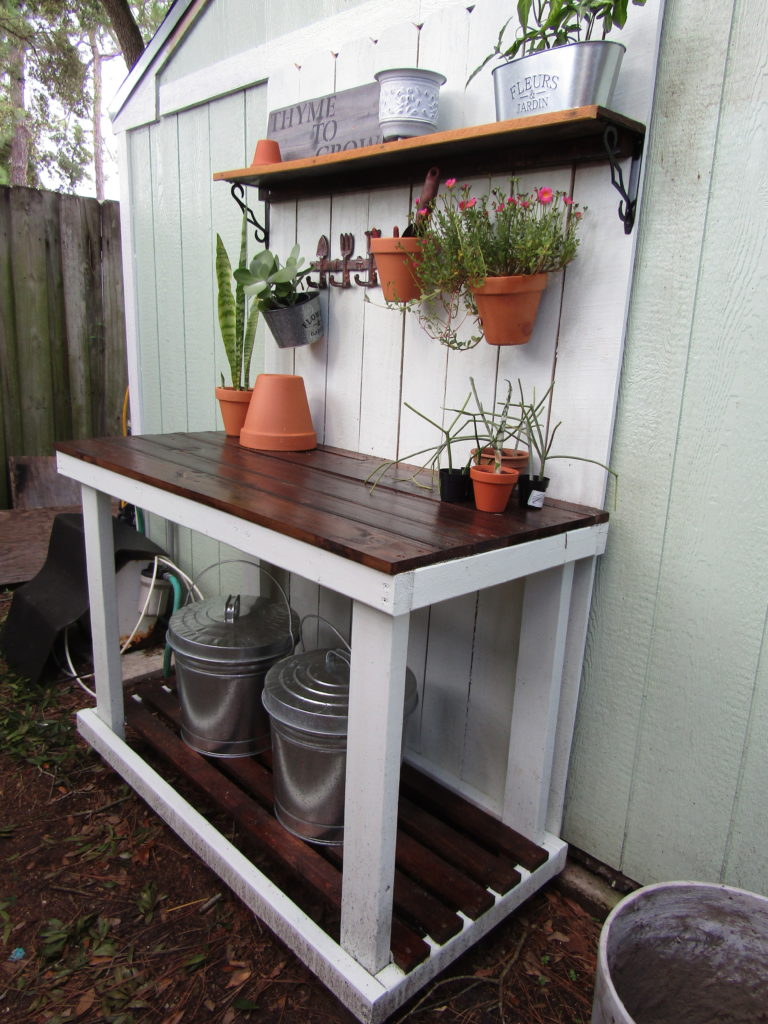
All the supplies were purchased the day before and the next day, with Tom and I working together, we were able to build this in one day. It is exactly what I was hoping for. The locking lid trash cans on the bottom are holding my potting soil. Because we have lots of things that get into those more open bins, I thought this was a safer choice. I didn’t want to pull out a drawer of dirt and have a snake waiting for me. I really like the cans. Even when they are full, they are not too heavy to lift and they look great. Plus they are rust-proof. Did I mention also snake-proof?

Paint and Stain
The dark stain on the work surface and shelves make a lovely contrast with the white paint.
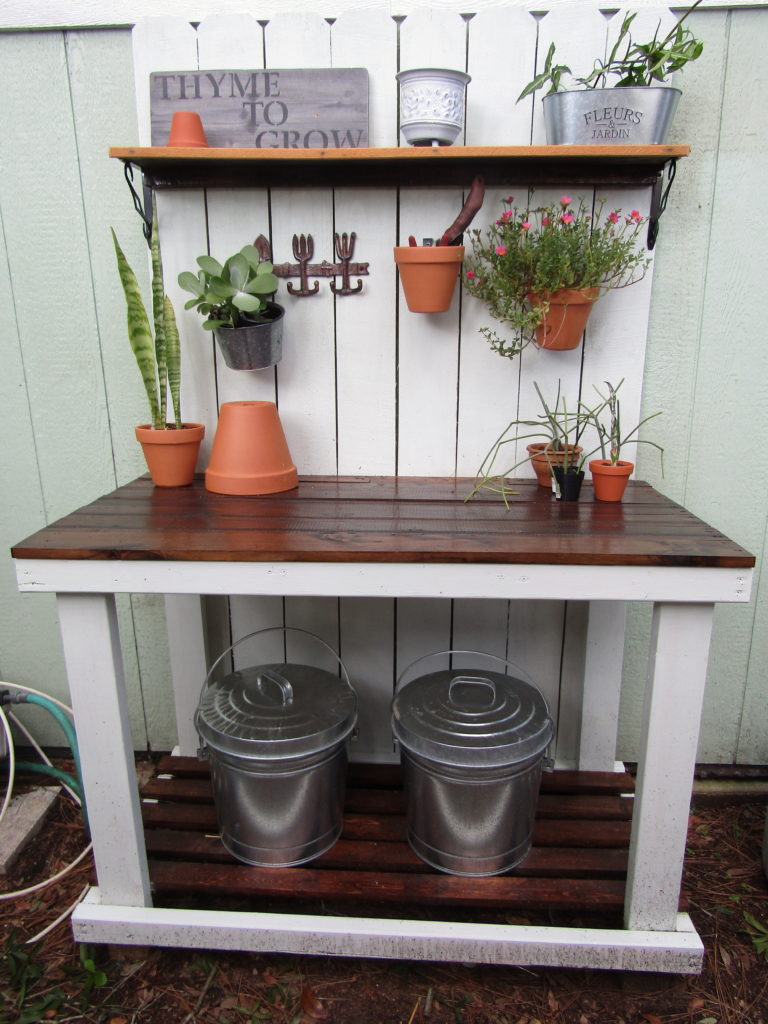
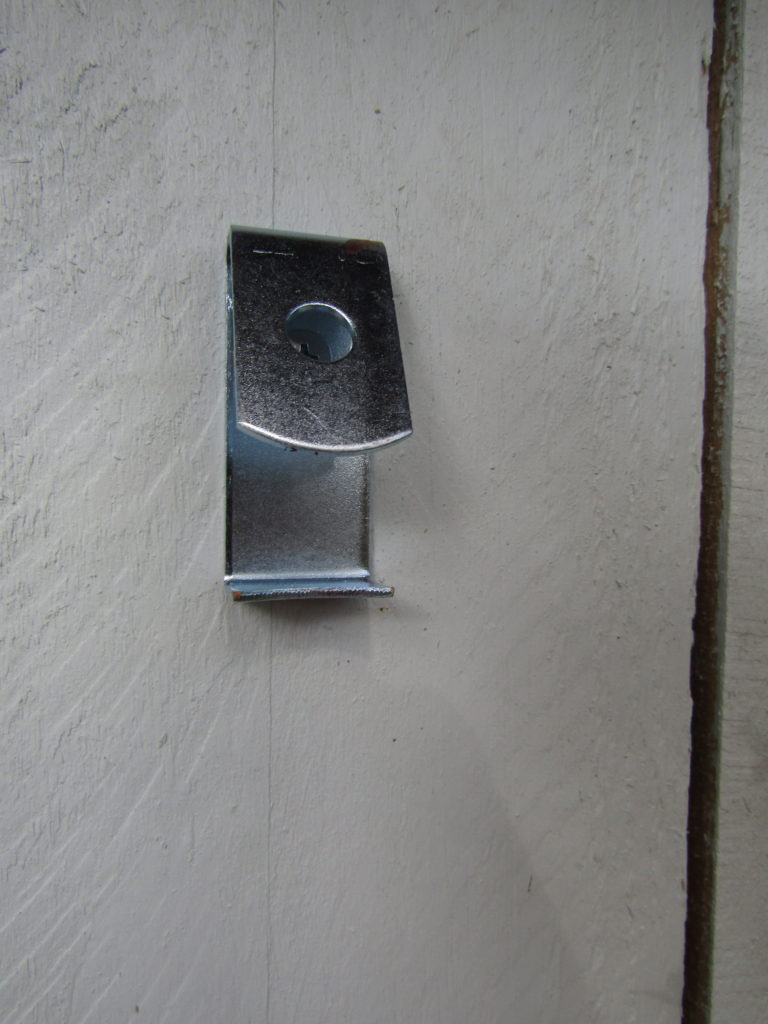
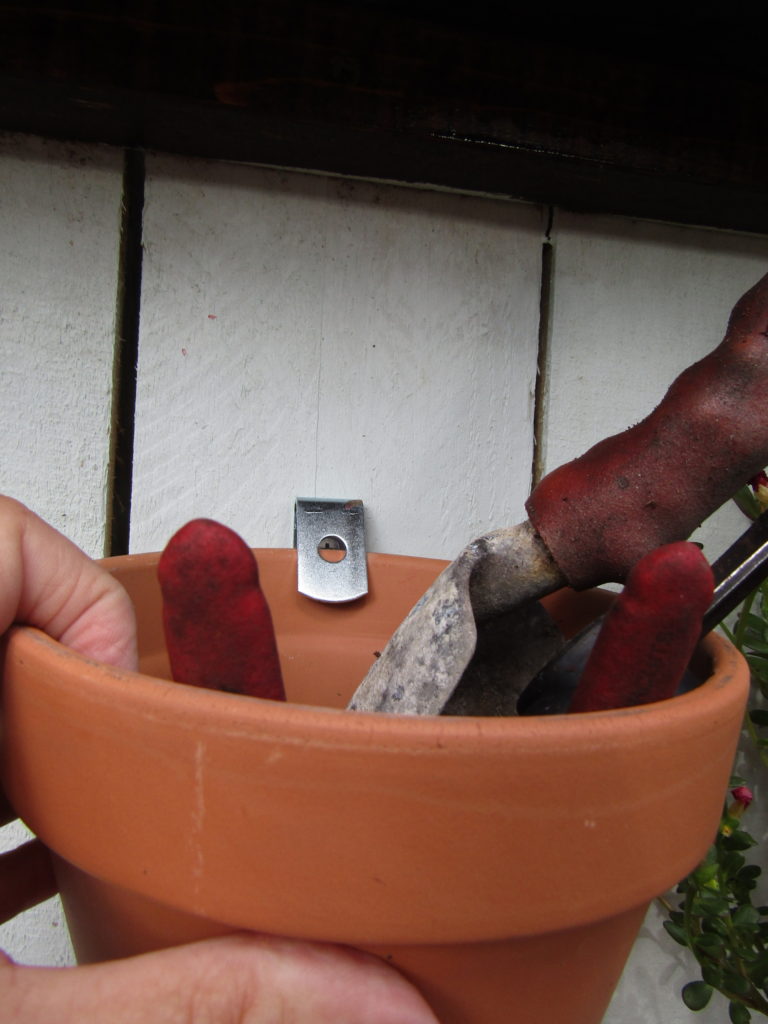
I absolutely love these clay pot clips. It just takes a minute to install and the clay pot just locks into place.
Fun Accessories
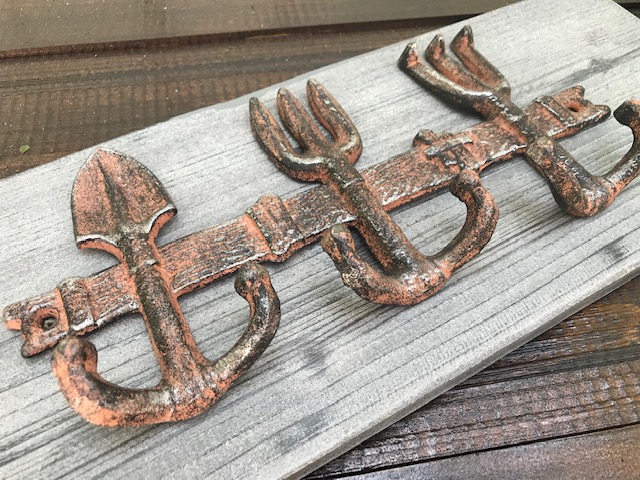
I wanted a unique hook and was so lucky to find this beauty. So cute and it gave me the board for the fun sign I wanted. It was just screwed on so I took it off the board and mounted it on my potting bench with the same screws.
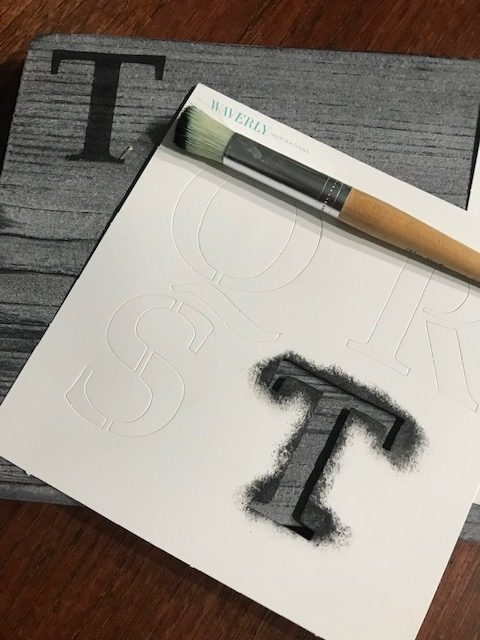
I stenciled my sign. The wood was rough so I used the pounce method. After it dried, I sealed it with 2 coats of clear spray. It was simple but it makes me smile.
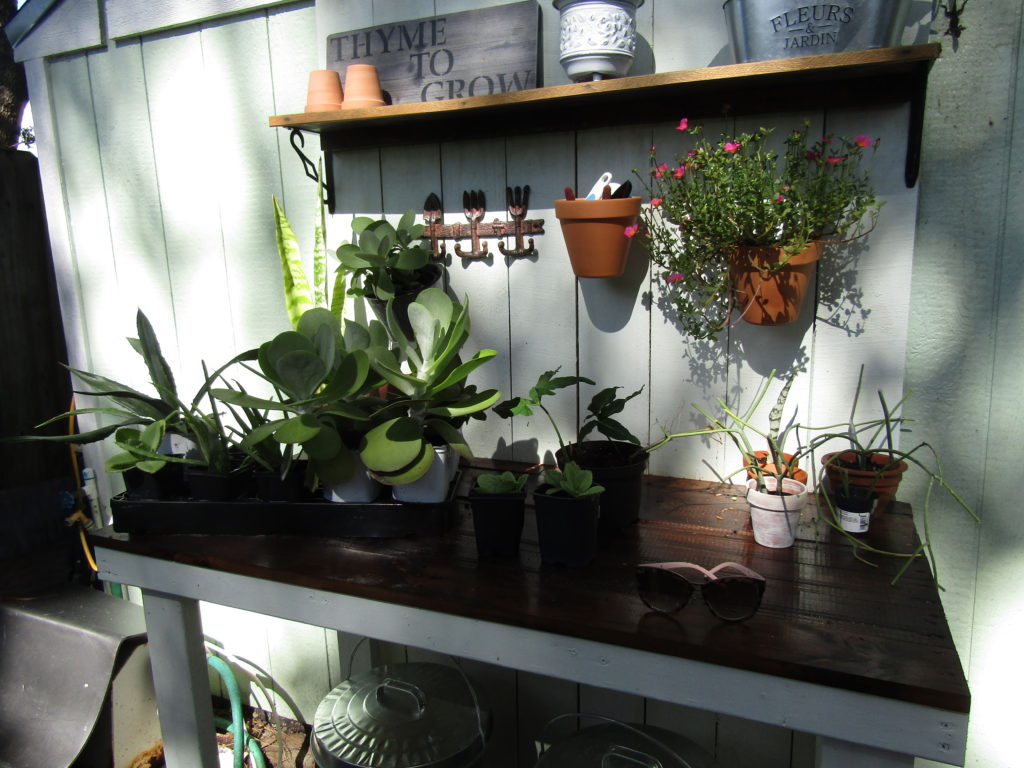
I started using my bench as soon as I painted it. Here are a bunch of plants I have potted for a yard sale we are about to have. Last year we sold out!
I hope you enjoyed this post and it inspires you to build your own potting bench. Thank you for stopping by! I would love to hear from you.


Janet
July 28, 2019 5:20 pmYou make me miss Florida! I love the dark stain on the work space. Can’t wait for your next project!
SSDays
July 30, 2019 2:09 pmThank you. It was a fun project and no matter how dirty the surface gets I can just brush it off and it always looks clean. I like that about the dark surface.
Beth Celuck
June 3, 2024 12:49 amDo your bins hold a full bag of potting soil? I would assume the smaller size bag.